-

- Forums
- Chatrooms
- Gallery
- Gameplay Videos
- Upload
- Articles
- Mod Reviews
- Shop SP: Games, Movies, Books
CHAPTER 1 | CHAPTER 2 | CHAPTER 3 | CHAPTER 4 | CHAPTER 5 | CHAPTER 6 | CHAPTER 7 | CHAPTER 8 | CHAPTER 9 | CHAPTER 10 | |
TEMPLE RUINS
Anath
Now I head over to the Temple Ruins. Once I get there, I have Anomen change his Storm of Vengeance slot over to a Sunray. The Sunray will be more appropriate here.
I soon run into a Werewolf named Anath, and follow her into her cave. She explains that the Shade Lord is the true source of the evil that has been afflicting the Umar Hills. I fall in with her request. I also loot the pool for a bit of treasure after she leaves.
I then continue east, killing the odd Shade Wolf along the way. I soon find the entrance to the Temple, fighting Shadows and Shadow Fiends along the way. Anath warns me to turn the nearby crystal to brighten its reach and therefore become fatal to the Shadows and Shadow Fiends, but then she dies.
Amauna's Bones
Now I enter the Temple itself. I go along the hallway and open the first door I see. I have to fight a few Shadow Wolves, Shadows, and a couple of Skeleton Warriors. The fight is actually easy enough, although I remain vigilant in that I have Keldorn peck away at a Skeleton Warrior with the Azuredge until it gets disrupted. A container in the room has Amauna's Bones, which is a quest item I'll need pretty soon.
Mazzy Fentan
Now I continue north to the next room. I kill the Shadow Jailor and then loot his Shadow Prison Key. I use the key to open the adjacent door on the right hand side. I free the Halfling NPC Fighter named Mazzy Fentan, but I don't accept her into my party.
Sun Gem
Now I continue north, where I find a large stone head. I ignore this for now. I continue west and then south, killing the odd Shadow Wolf or Shadow along the way. I then find a large luminescent pedestal. I click on it to get the Sun Gem, which is a quest item I'll need very soon. The room darkens, and I have to kill a few more Shadows.
I continue east. A pillar holds the Morn Ritual, which provides a few clues that I'll need to recall later on.
I continue on into the main hallway of the Temple.
Tome of Amanautor and Noontide Ritual
Now I head further west along the hallway. I use the Sun Gem to open the black door. I continue on, and then turn south and across a narrow gangway. I get ambushed by several Shadows. A few Mummies and Skeleton Warriors also approach from the east. I take out the Shadows and Mummies in close up combat. Keldorn switches over to his Azuredge and uses it to take out the undead that are the relatively hardest to bring down with raw damage, the Skeleton Warriors.
In a room on the other side of the lava pit will be a Lich. It can be dangerous to try and charge the Lich, since the party would have to travel over the lava and then come in through the door where the Lich will have a head start. Instead, I rely on summoned creatures to coax it out and then ultimately kill it. I have Anomen summon a Skeleton Warrior, and send it on ahead. This forces the Lich to expend a Death Spell. I then follow up with another Skeleton Warrior. The Lich starts to follow me, so the party retreats. Keldorn then summons an Astral Deva. Imoen soon summons a Nishruu as well, but it proved unnecessary. An Astral Deva can be a really effective killer of undead, Liches included. It can't be killed by the Death Spell, has plenty of magic resistance, and it packs a potent Mace of Disruption as well. It soon kills the Lich instantly.
Jaheira casts Protection from Fire on Imoen afterwards, so that she can safely search and loot the containers around the lava pit. The loot includes magical ammunition, as well as the Pearly White Ioun Stone (regenerate 1 hit point every 10 seconds), which Imoen wears for the rest of Shadows of Amn.
The party continues on to the room north across the lava pit. A container holds a spell scroll for Wyvern Call (not a big deal), the Tome of Amaunator, and the Noontide Ritual. The latter two items provide information that will be helpful in making progress.
Shadow Dragon Wardstone
Now I head south across the lava pit. I find the spirits of Amauna's followers, who stand watch over where Amuana's body was supposed to be left to rest. The followers go to final rest after I bring her bones back to this room. Amuana's spirit soon shows up, and then rewards me with a Shadow Dragon Wardstone and the Dusk's Night Symbol before she herself goes to final rest. I am rewarded with 17,500xp for this. The Wardstone gives me the option of avoiding the Shadow Dragon if I need to. The Symbol is one third of a Holy Symbol of Amaunator that I'll need to assemble.
The sarcophagus in the room has some Sunstone Bullets +1 (+1 fire damage) and a spell scroll for Pierce Magic.
Lightstone Symbol and Evening Ritual
I continue south and stop short just as the tunnel bends to the east. Avastrian prepares himself with some buffs, while Jaheira casts Protection from Fire on herself. Avastrian summons a Simulacrum through his Vhailor's Helm. Anomen then casts Remove Fear.
To the east and then a little north will be a Lich and several of its undead minions, including Skeleton Warriors and Greater Mummies. Anomen begins casting a Fire Storm from just outside their fog of war. Once the casting is almost complete, Avastrian, his Simulacrum, and Jaheira rush forward. Anomen adds another Fire Storm on top. The Lich's Remove Magic forces Jaheira to retreat. The double shot of Fire Storm does, however, suffice to roast all of the Lich's servants.
Once the Fire Storms have worn off, I have to change tactics since the Lich remains unscathed. Anomen begins to tie it down with a Skeleton Warrior, and more afterwards. Keldorn brings in an Astral Deva. Imoen then throws in a Nishruu for good measure. For the most part the party is able to stay out of harm's way and let the summoned creatures do their work. The Deva manages to disrupt the Lich.
Avastrian then proceeds to the room that the Lich had been guarding. Note the lettered tiles running across the floor. The way to get across safely is to step on the right letters so as to spell out A-M-U-N-T-O-R.
There will then be two smaller rooms on the other side. The one on the right has a Shadow who's easily killed. The container behind it has the Lightstone Symbol, which is another third of the Holy Symbol of Amaunator.
The room to the left has a Bone Golem, which Avastrian kills by himself. The container has spell scrolls for Disintegrate and Protection from Magical Weapons, 10 more Sunstone Bullets, Arla's Dragonbane (+3 Sling), another Sun Gem, and the Evening Ritual.
I hand all of the quest items over to Keldorn.
Symbol of Amanautor
I have Keldorn do this by himself, since he has Boots of Speed and it's a lot smoother than having the whole party go back. He heads for the Statue on the north side of the Temple. He has no trouble killing the odd Shade Wolf by himself.
Once he reaches the statue, the three ritual tablets provide clues as to the proper sequences. Basically, each ritual has only two of the necessary steps described, but with one missing. For the one that's missing, you have to look at the other two rituals to find out what that the missing step is not.
The correct sequences are as follows:
Thaxll'ssillyia
Now comes the fight against the Shadow Dragon. At this point I now need to highlight some of the changes that SCS makes to the Dragons in the game. One, the Dragons get triple their usual hit points (at least in my installation). Second, they love to use their Wing Buffet attacks with much more frequency, which can make sustained physical attacks on them a lot more difficult. Third, they'll use their breath weapons more often, sometimes right away once the fight starts. Fourth, the game provides them certain immunities, like immunity to instant death attacks for example.
It is also now appropriate to offer some general guidelines for fighting dragons:
*Evil* Thaxll'ssillyia
With the evil party, I'm not as melee-heavy as the good party, meaning that I'm reluctant to have Viconia and Jan come within close range of the Dragon. I thus keep them back using their crossbow and sling respectively.
So Korgan and Asteroth land the first blow. Viconia summons a Skeleton Warrior. Edwin hits the Dragon with Breach once it puts up a Protection from Magic Weapons.
Asteroth gets knocked back by Wing Buffet, so now that he's at a distance he takes the opportunity to cast Summon Elementals, and then puts his Ironskin back up.
Unfortunately the Shadow Dragon hits Jan with its level-draining breath weapon. He retreats. Summoning the meat shields continues with Edwin bringing in a Mordenkainen's sword, and Viconia bringing in another Skeleton Warrior. Edwin then retreats a bit to avoid the Dragon's breath weapon, and now hits the Dragon with a Lower Resistance spell with a view towards softening it up for offensive spells. He then follows up with a double shot of Magic Missiles (Minor Spell Sequencer).
Asteroth and Korgan stay on top of the Dragon, while Edwin begins to crank out Horrid Wiltings and Magic Missiles. Except Korgan is starting to get severely hurt by the Dragon, so Viconia makes a calculated gamble to get close and Heal the dwarf. There's a temporary setback in that the Dragon wing buffets both of them back. However, and this is one of the beauties of Heal, Viconia makes her saving throw so she completes Heal even after getting hit with the buffet. Also, so long as Heal starts, it will complete on its target. So even though Korgan since ran away on Viconia, he still benefits from Heal.
The pressure continues until Edwin finishes off the Dragon with a Horrid Wilting.
Now I get a bunch of booty, plus the Crom Faeyr scroll and the Shadow Dragon Scales. Korgan will soon get the Crom Faeyr hammer, while Asteroth promptly has the Scales made into the Shadow Dragon Scale armor (AC -1, +50% acid resistance) for him.
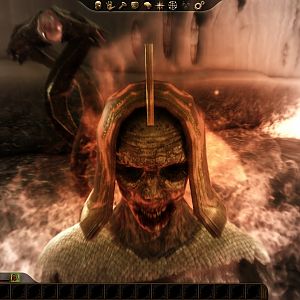
Shade Lord
Now I do a little buffing up, including Mirror Images and Remove Fear. I step through the door to the west, and confront the Shade Lord. Gone are the days in vanilla BG2 where I could simply spit out Sunrays and kill everything instantly. The Shade Lord won't be affected by the damage anymore. It also comes with plenty of pre-buffs, including Improved Invisibility, Mirror Images, and Protection from Magic Weapons. It can also drain levels with its attacks.
My strategy is based on having only Avastrian and Anomen (who are protected against level draining) step up to the Shade Lord. The rest of the party either kills the other Shadows, like Shadow Patrick, or aims missile weapons at the Shade Lord at a safe distance. The same formula works. Keldorn gets rid of the Shade Lords illusions with True Seeing. Imoen then brings down the rest of its buffs with Breach. This allows Avastrian and Anomen to kill the Shade Lord for 25,000xp. The party then destroys the Shade Altar to win the battle.
Once the battle is won the darkness clears. Merella the Ranger, whose body had been possessed by the Shade Lord, dies. She leaves behind a Rogue Stone, a King's Tear, and the Cloak of Stars (create 6 +5 Darts once a day). Shadow Patrick leaves behind the Dusk Blade (+2 Halberd, +2 cold damage) and the Darkmail +3 (armor class 3).
I then give the good news to Minister Lloyd and the party gets +1 to reputation, 25,000xp, and the Night's Gift (+5 leather armor, +20% to Hide in Shadows).
I then have Cromwell forge the Shadow Dragon Scales into the Shadow Dragon Scale Armor (armor class 1, +50% acid resistance). This will be Minsc's armor, as he can still go into stealth mode in it.
The Windspear Hills are next.