-

- Forums
- Chatrooms
- Gallery
- Gameplay Videos
- Upload
- Articles
- Mod Reviews
- Shop SP: Games, Movies, Books
CHAPTER 1 | CHAPTER 2 | CHAPTER 3 | CHAPTER 4 | CHAPTER 5 | CHAPTER 6 | CHAPTER 7 | CHAPTER 8 | CHAPTER 9 | CHAPTER 10 | |
LICHES
Daystar
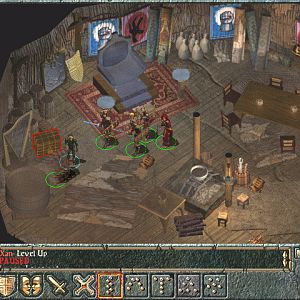
Now I head to the Crooked Crane Inn in the Gate District. Imoen unlocks a secret door. Only Avastrian and Keldorn go down.
There will be a Lich that immediately attacks. I try to have Keldorn immediately hit it with Azuredge, but it didn't work (it sometimes does). So, I now have Avastrian summon a Simulacrum via his Vhailor's Helm. Keldorn then uses True Seeing. The Simulacrum then uses one of the Scrolls of Protection from Magic from its quick-item slot to neutralize the Lich's spells and prevent it from casting spells. This is a pretty standard trick.
The Lich is still able to protect itself with a Spell Sequencer. But Keldorn easily rips these protections down with Carsomyr. The Lich soon falls.
Imoen enters, and loots the chest for:
Alhoon
Now I head back to the Sewers beneath the Temple District. I head towards where I had earlier fought Tarnor the Hatchetman. Imoen unlocks a secret door. The party travels through the hallway on the other side and some of the party members get stunned by psionic energy, a sure sign that Mind Flayers will be on the other side of the stairs.
The same tactics work for the Mind Flayers as well. Anomen layers everyone in the party with a Chaotic Commands, and then summons five Skeleton Warriors. This suffices to ensure I can cut down everything in my path, especially when Hasted.
I gradually work my way westwards in this dungeon. There will be one last room towards the northwest corner. It has the usual suspects plus an Alhoon, a lich-like undead creature that was once an Illithid. Sending the Skeleton Warriors ahead ensures that the Alhoon's helpers either get killed by the Skeleton Warriors (i.e. the Umber Hulks) or they teleport to my party where I kill them myself (i.e. the Mind Flayers). This leaves the Alhoon by itself. Note that I wait until I see the message 'Mordenkainen's Sword - Unsummoned'. This more or less means that the Alhoon's Spell Immunity: Abjuration has also worn off. Keldorn hits it from off-screen to strip away any remaining protections. Now I charge forward. Keldorn's True Seeing and then Imoen's Breach ensures that it is brought down quickly.
The container in the room holds:
Shade Lich
Now I leave the dungeon, and head back to where I had earlier found the Cult of the Unseeing Eye. More specifically, I head to the crypt near where I head first met Sassar. Inside the crypt will be the Shade Lich, which will emerge if I click twice on the crypt. I didn't mind cheaping out the Lich underneath the Crooked Crane, since I was forced to fight it in a narrow space. I am willing to beat the Shade Lich with more conventional methods since I have more space to work with.
I keep most of the party well back. Avastrian places himself near the crypt. Anomen summons a couple of Skeleton Warriors. Avastrian then clicks on the crypt to start the fight. Keldorn then summons an Astral Deva.
The Shade Lich summons a Dark Planetar. Avastrian casts Protection from Magic Weapons to protect himself against vorpal hits from the Dark Planetar. He then uses a Whirlwind Attack to waste the Planetar. After that it's simply a matter of letting the Deva and the Skeleton Warriors go to work. The Deva eventually manages to disrupt the Lich.
Avastrian clicks on the crypt again to get the Golden Arms & Legs.
Lord Roenall's Keep
The Keep Messenger runs up and speaks to me as soon as I emerge from the Sewers. The Keep is under attack from the forces of Lord Roenall. I rush back to the Keep, rest up in order to have Stoneskins and Iron Skin in place, and then speak with the Major Domo.
I then rush back outside. It's a simple matter of Avastrian making a b-line for Lord Roenall and killing him as quickly as possible. The party gets 50,000xp for defending the Keep.
Elemental Lich
Now I travel to the Bridge District. I then travel to a building towards the south corner. Imoen disarms a trap on the door on the west side. The party then enters, loots a few minor treasures, and then heads down the stairs.
Within view will be another sarcophagus. Inside will be the Elemental Lich. Most of the party hugs the corner to the east. Anomen summons two Skeleton Warriors. The strategy is pretty much the same as for the Shade Lich, but with an important proviso. The Elemental Lich has a different casting style, and it's most noticeable when it comes to the High Level Ability spells. Whereas the Shade Lich would summon a Dark Planetar, the Elemental Lich can go ballistic with spells like Comet and Dragon's Breath. These spells will ignore magic resistance and the Cloak of Mirroring. Thus I have Avastrian click on the sarcophagus twice to start the fight, and then he retreats out of the Lich's view. Keldorn summons an Astral Deva. I let the summoned creatures go to work while the party itself is out of the Lich's fog of war.
Avastrian then clicks on the sarcophagus again, and gets the Golden Torso.
Twisted Rune
Now I rest up at the Five Flagons Inn and then return to the same building. This time Imoen disarms and unlocks the door on the east side. I also expend one of my Rogue stones to get through.
I arrive in a lair of some sort of organization called the Twisted Rune. The fight ahead will include a powerful Lich named Shangalar, a Vampire named Shyressa, a Beholder named Vexall, a fighter named Revanek, and a Mage named Layene. This fight is jacked up in SCS. Revanke will use potions to boost his fighting ability, and Layene will make constant use of her Staff of the Magi to keep herself out of sight from the party.
There isn't really a set script that can be followed for a fight like this, but there is also a definite strategy here. The party buffs itself up against magic, including Protections from Fire. I do everything I plan on except for Haste and Remove Fear. Once only those two are left, I do my summons. Anomen summons a Skeleton Warrior. Keldorn summons an Astral Deva. Jaheira summons an Elemental Prince (I always make sure it's someone else other than Chan for obvious reasons). Once the summons are complete, that's when I use Remove Fear and Haste so that the meat shields benefit as well.
The party now runs for the east side of the room. I complete the dialogue with Shangalar to get the battle started, and then go completely over to the other side. Shangalar will teleport to the west side where I had first arrived. This allows my summons to obliterate both Shangalar and Revanek.
Shyressa remains at the east side, and the first priority is to kill her off as quickly as possible before she can level-drain anyone.
Layene remains north of the table. Jaheira aims her Insect Plague at one of Layene's illusions, to take Layene 's spells out of the battle for a little while.
Vexall and Layene remain dangerous opponents though, so I do a bit of Vhailor's Helm cheese. I summon a Simulacrum of Avastrian. The Simulacrum attempts to use the duplicated scroll of Time Stop in order to try and take down Vexall. But Vexall had too many protections in place, so the Simulacrum used a Scroll of Protection from Magic on it instead to prevent it from casting spells. Vexall can still use its inherent Beholder eye powers, however, so it still takes some effort to bring him down.
Now only Layene's left. She still takes some effort, because she constantly uses her staff to go invisible and try and give the party the slip, and buy herself time to cast more spells. Once I get the chance, I have the Simulacrum use its second Scroll of Protection from Magic on her. The party is able to cut her down afterwards.
Layene leaves behind the Staff of the Magi (+5 enchantment, invisibility upon equipping, Protection from Evil on wielder, dispel magic on target, +2 armor class, +2 to saving throws, Spell Trap that lasts 8 hours 1/day, Fireball-Lightning 3/day). By far the best staff in the whole game, Throne of Bhaal included. For Imoen, it makes her trap detection easier. She can now search for traps while hidden. She can also invoke its Spell Trap power at the start of each new day. It also provides a great defensive resource. Many, but not all monsters, will be dumbfounded when they attack her but then find her simply vanishing at will. In fact, the Robe of Vecna and the Staff of the Magi combined form an extremely potent combination. Imoen can simply cast nearly any spell with a Speed Factor of 1 or 2, pause the game, click on her bow, then click on her Staff, disappear, and go to work again with another quickly cast spell, and so on and so on.
Vexall leaves behind his eyestalk. I pick it up and then click on the cauldron at the northeast corner. I then click on the machine at the northwest corner, allowing me to return to the Bridge District.
Lich in the Docks
This Lich is added by the Tactics mod instead of SCS. It will be in a small building towards the northwest corner of the Docks District. One of its approaches to combat is to blanket the inside of the small building with Incendiary Cloud and such, and also pelt the party with offensive spells. If the party tries to protect themselves with Protection of Fire and such, the Lich will freely use Remove Magic to render the party vulnerable again. It also has several magic-resistant Skeleton Warriors to help it out.
The approach is a simple one. Keldorn goes in by himself, and then tags it dead with his Azuredge. He then rushes back out to let the cloud spells expire. Two of the Skeleton Warriors follow Keldorn out, but then I just kill them. The whole party enters the building again, and kills off the other two Skeleton Warriors as well.
The Lich leaves behind the Cloak of Balduran (+1 armor class, +1 saving throws, +25% magic resistance). This will be Keldorn's cloak for the rest of the game. The Item Upgrades mod allows the magic resistance bonuses from both Carsomyr and the Cloak and Kaligun's Amulet of Magic Resistance to stack together, transforming Keldorn into a bona-fide Mage killer.
Kangaxx the Demi-Lich
Now I rest up at the Sea's Bounty Tavern. Imoen then disarms and unlocks a door that's just a little east of the Sea's Bounty. The party goes inside and kills a few Minotaurs. Jaheira loots a few minor treasures, and then the party heads downstairs.
There will be another crypt here. I have Avastrian and Anomen go near it. The rest of the party hugs the east corner as tightly as possible to be out of view of the monster that will rise from the crypt.
Avastrian summons his Simulacrum, and then has the Simulacrum use the two spammed Scrolls of Protection from Magic on both Avastrian and Anomen. Avastrian uses the Golden Arms and Legs and the Golden Torso on the crypt, which allows Kangaxx the Lich to rise.
Keep in mind that with the latest release of SCS, Protection from Magic isn't necessarily the free ride it used to be. One thing that will still work on a character who has used a Scroll of Protection from Magic on himself is the inherent fear ability of certain monsters. This includes Liches. In fact, Kangaxx the Lich is going to try and exploit this by trying to summon several Demons, who themselves have fear auras. Chances are, with multiple fear auras in effect, Avastrian and Anomen could easily find themselves unable to fight back and getting overwhelmed.
It is thus imperative to get through Kangaxx the Lich as quickly as possible. Once the Lich rises, Keldorn hits it with a Dispel Magic from outside the fog of war. This allows Avastrian, his Simulacrum, and Anomen to quickly bring it down.
Only, Kangaxx the Demi-Lich now rises in its place. It immediately summons a Bone Fiend. Both the Demi-Lich and the Bone Fiend have fear auras, so I have a bit of a rough ride. But once the Bone Fiend and the Mordenkainen's Sword are unsummoned, Avastrian and Anomen can then concentrate on the Demi-Lich. Keldorn rips down its protections with Dispel Magic as needed. The reason I prefer to use my spammed Scrolls of Protection from Magic on Avastrian and Anomen, instead of on the Lich and then the Demi-Lich directly, is that I want to have two characters who can attack the Demi-Lich so as to outpace its regeneration ability. Once the Demi-Lich reaches 'badly wounded', I have Avastrian uses his Whirlwind Attack to help finish it off.
The Demi-Lich leaves behind the Ring of Gaxx (armor class +2, +2 to saving throws, +10% magic resistance, immunity to disease, regenerate 1 hit point every 3 seconds, Invisiblity 1/day, Improved Haste 3/day). Easily the best ring in the game, and Avastrian will wear it for the rest of his adventures. He hands off the Ring of Preservation +2 to Minsc.
I then head over to Cromwell's, and have him combine Jaheira's Ring of Protection +1 with the Ring of Regeneration that I stole from Ribald, plus 10,000 gp, to create the Ring of Preservation +1 (+1 armor class, +1 to saving throws, regeneration 1 hit point every 3 seconds). This will be one of Jaheira's rings for the rest of the game.
Now I have a quest involving Mae'Var's Guildhall.