-

- Forums
- Chatrooms
- Gallery
- Gameplay Videos
- Upload
- Articles
- Mod Reviews
- Shop SP: Games, Movies, Books
|
|
CHAOS MOLIRI

Messengers to Arnika
I start off at the southeast corner of the Arnika-Trynton Road. I travel the road until I reach Arnika at the north end, battling numerous monsters along the way.
A new occurrence takes place as I approach Arnika. I get attacked by Rattkin Elminators, but I deal with them easily enough before entering Arnika.

Chaos Moliri
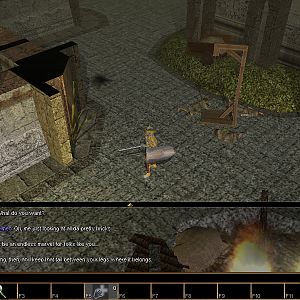
Now I head towards the point labelled 'Mook' on the Arnika map. A hologram will address me, and I give him the Mook Alliance Offer to get inside the building. the Mook leader, Screg, allows me a view of the Chaos Moliri, "down the hall and to the right".
To the left is a Book of Set Portal, which Vi Domina inscribes. She also now has both the Set Portal and Return to Portal spells.
There is a top level in the building. It has a Scanner, which a Gadgeteer can combine with the X-Ray Chip to create an X-Ray Scanner that replicates the X-Ray spell. For anyone who's interested, the second floor also has a Mook Psionic named Urq who can be recruited into your party.
The right side of the main floor is where I find the Chaos Moliri. I need the Fake Astral Dominae that I obtained beforehand to pull this off. I first take the Chaos Moliri, only to receive a warning from several Mook to put the artifcat in its place. Trying to leave then and there will result in a fight wiht the Mook. But I have Terra place the Fake Astral Dominae where the Chaos Moliri had been, and that allows me to depart without having to slaughter the Mook.
Setting Portals in Arnika
I begin by fighting groups of Androids near the Savant Tower.
I next go to the upper bedroom at He'Li's Inn. It's time I addressed two objectives at the same time.
One objective is to establish a method for Vi Domina staying with the party even in areas she wants to avoid, Bayjin and any Rapax area. The idea is for Rothgar to set a Portal in the upper bedroom, as Vi Domina will be in He'Li's when she leaves the party when I try to enter either Bayjin or a Rapax area. When that happens, Ryu will set a portal where Vi Domina just left. Rothgar then casts Return to Portal to return to the upper portal. I collect Vi Domina and Ryu cast Return to Portal to go back to where I had been, but she'll stay because of this workaround.
The other objective is that I want Rothgar and Vi Domina to perfect their Air Magic skills. There will be a time when the party is faced with monsters that can cause really severe poisoning, and my priestly characters having lots of Air Mana will come in handy for casting Cure Poison. So the Set Portal spells they have present the opportunity to practice Air Magic.
The problem is that the Set Portal spell is coded with an anti-cheat timer. If a character casts Set Portal too soon after having previously cast it, it won't contribute to developing the Air Magic skill. The workaround is easy. Cast Set Portal, press 'q' to quicksave, press 'shift' + 'q' to reload the quicksave, and the timer will be voided so I can cast Set Portal again. Rinse and repeat until I run out of Air Mana. And the place where I want Rothgar to set his 'retrieve Vi Domina' portal is the perfect place for practice.
I go to Braffit and sell off potions or powders I don't want or need. I buy 15 Potions of Cure Lesser Conditions from him, and 30 each of Potions of Light Heal and 30 Potions of Heavy Heal. I eventually convert them together into Potions of Renewal that I sell. Chun-Li also practices Mindread on him.
I next sell off excess weapons and armor to Antone.
Now I go to the multi-tumbler door beneath the jail. Ryu and Chun-Li practice Knock-Knock on it. Chun-Li during this cycle obtains a perfect 100 skill points in Alchemy, so she doesn't need to participate in his part of the cycle anymore. But Ryu's Power Cast skill is at 97, just a little short of 100. So he'll continue with this part of the cycle.
19th Level Monk and Valkyrie
I keep going through the cycles. At some point I run into a new monster, three Savant Minions, along with four Savant Gunners. The Minions are 22nd level, and can paralyze or knock their targets unconscious. Ryu, Terra and Chun-Li each summon an elemental to help things along and to provide alternative meat shield targets.
RFS-81 and Vi Domina both advance to their 19th levels. Vi Domina takes Banish.
21st Level Fighter and Bard
A few cycles later and Zarax and Errol advance to their 21st level.
Bishop Masters Psionics
Chun-Li reaches 100 points in Psionics on the next cycle, so she doesn't need to practice Mindread on Braffit anymore.
19th Level Ninja
A few cycles later and Terra advances to her 19th level. She takes Boiling Blood, a single-target damaging spell which is distinct to the Alchemist's spellbook.
19th Level Bishop
Note how my training against anything other than Savant Slashers and Savant Minions involves my spellcasters practicing their magic skills through single-target spells. Ryu works on his Fire Magic skill through Energy Blast, and Terra does the same with Boiling Blood. Chun-Li works on her Wizardry skill with Frost.
A few cycles later and Chun-Li advances to her 19th level. She takes Restoration, a spell that will both heal a single party member and rid him or her of conditions like poisoning or disease.
Power Training a Samurai
I defeat a pair of Savant Slashers and several Savant Gunners during the next cycle.
Ryu reaches 100 points in Power Cast when using Knock Knock on the vault door, so I don't need to bother with this part of the cycle anymore.
Lord and Valkyrie Master Air Magic
Now I stay in the upper room of He'Li's. Vi Domina wears the Brilliant Helm, and casts Set Portal through Q, Shift + Q and Shift + M. She passes on the Brilliant Helm to Rothgar for his turn. The party rests up and puts its buffs back up. I check around the Savant tower to see if there's any monsters to fight. I simply Shift + Q if there aren't, or fight what comes my way and come back to the room and quicksave.
Vi Domina and Rothgar both eventually reach 100 points in Air Magic, so now I leave Arnika and attend to business.
Z'Ant T'Rang and the Chaos Moliri
I go south from Arnika itself, and enter the teleporter at the T'Rang House.

That brings me to the T'Rang Teleporter in Lower Marten's Bluff. I go west and up through the trapdoor to the west.

That brings me to the 'Trapdoor' on the map of Marten's Bluff. I go around the west side of the fortress, fighting monsters like Helligators and Deathsting Apuses along the way, until I enter through the 'Front Gate'. I take the 'Elevator' down.
That brings me to the spot marked 'E' on the map of Lower Marten's Bluff. I speak to Z'Ant Trang and give him the Chaos Moliri during the interaction. But he lets me hold onto it on behalf of the T'Rang Empire. He also gives the party 8,000gp and everyone in the party gets 150,000xp.
Rothgar and Ryu advance to their 20th levels. Rothgar takes Lifesteal, which can devastate a single-target and give Hit Points to the party member most in need of it.
Ryu takes Banishment, so he can cast it too. It will be augmented by his Power Cast skill as well.
The party goes back to the T'Rang Teleporter the way they came, fighting a few more Deathsting Apuses along the way. This time I press on the first button on the left hand side, so that a large bridge appears on the panel screen. I then step through the teleporter.

Geomancers and Vines
I arrive north of the bridge leading to the Umpani Camp. But first I go around for a little monster hunting. It amounts to groups of either Geomancers, or Acidvines. I cross the bridge and enter the Umpani Camp after that.

Mook Alliance Acceptance
I head north and speak to Sergeant Balbrak at the spot marked "Recruitment". I give him the letter titled "Mook Alliance Acceptance". Balbrak gives the party a Security Pass Level 5, and everyone in the party gets 160,000xp.
I am also to report to General Yamir. So I go to the elevator at the north end and use my Security Pass to take it up.

Morax Batlords and Bat Vampires
I arrive at the elevator marked as "To Umpani Camp" in the northwest corner of the map of the Mount Gigas Caves. I go south until I encounter seven Bat Vampires. I blow them away with several characters using Banish, including Errol with his Cornu of Demonspawn.
I continue south again and run into seven more Bat Vampires, led by two Morax Batlords. Vi Domina puts up Soul Shield, while Chun-Li puts up Elemental Shield, to protect against the Batlords' spells. The other characters blow away the Bat Vampires with Banish. And that leaves me free to physically cut down the Batlords one at a time.
RFS-81 and Vi Domina both advance to their 20th levels. Vi Domina takes Ressurect. I doubt I'll need to use it, but it provides a hefty boost to her Divine Mana.
I make my way to the elevator at the spot marked "To Upper Caves". I use the Security Pass to take the elevator up.

Underwater Rescue Mission
I start off at the elevator at the spot marked "To Lower Caves". I continue north until I have to use my Security Pass Level 5 to get through a door.
And from there I go to meet General Yamir, who gives the party a mission to rescue soldiers of his who have gone missing in a place called Bayjin. He also gives the party a Security Pass Level 6.
Now I go southeast and fight an Ensnaring Spider. Ryu had a close call, but Terra managed to kill it in time.
I use the Security Pass Level 6 at the computer at the spot marked "Security Clearance. It opens the door to the cave marked "UTU".
I speak to Sergeant Rubble, who instructs me to put on Scuba Gear. There's eight pieces of Scuba Gear in the nearby station. Each party member needs to equip one in one of their miscellaneous slots to avoid drowning while underwater. Sergeant Rubble then instructs me to enter the water tunnels that start at the south end of the cave.
But a problem emerges in that Vi Domina insists she won't go near anywhere near Bayjin, and leaves the party.
Now I show the workaround. Ryu casts Set Portal at the start of the Water Caves. Rothgar casts Return Portal to return to He'Li's in Arnika, where I bring Vi Domina back into the party. Ryu casts Return to Portal to return to the Water Caves. Now Vi Domina will be around as I begin exploring the Water Caves, although she will complain a lot.