-

- Forums
- Chatrooms
- Gallery
- Gameplay Videos
- Upload
- Articles
- Mod Reviews
- Shop SP: Games, Movies, Books
|
|
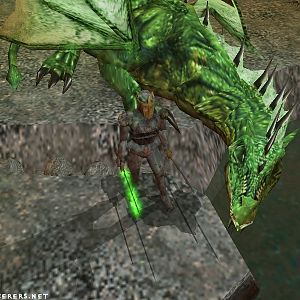
RAPAX AWAY CAMP
To the Rapax Away Camp
Chun-Li casts Return to Portal so that I return to where I found the Silver Nugget in the Old Mine Tunnels. I follow the trail to its end, so as to enter Lower Marten's Bluff.

That bring's me to the entrance marked "Old Mine Tunnels" on the east side of the map of Lower Marten's Bluff. I go west and take the elevator at the spot marked 'E'.

I am at the 'Elevator' on the map of Marten's Bluff. I try to leave through the north door, but it closes on me. All I need to do leave the room through the south door, and come back to the north door so that it opens again.
I leave north through the front gate. I fight Swarming Wasps along the way. I then leave Marten's Bluff through the exit to the north.

I am now at the point marked "Marten's Bluff" on the south side of the map of the Swamp. I go north and kill some Souldrinkers and Tiger Mosquitoes. I then travel northeast to kill a couple of Oozites. I follow the trail that goes east until it leads to the entrance to the Southeast Wilderness.

I arrive at the west entrance to the Southeast Wilderness. I kill several Ravenous Swallowers just a little south of the entrance.
I follow the trail that goes north and then east over the mountain, and kill a couple more Ravenous Swallowers along the way. I follow the trail to its bottom, and kill several Tanto Wasps.
I notice a group of Savant Androids, so I pursue and kill as well.
I return to the bottom of the mountain, on its east side. The trail branches, with one path leading north and to the Mountain Wilderness (where I've already been).
I follow the east path until it veers south and then forks east and south. I follow the east trail.
RFS-81 and Vi Domina express a desire to leave the party as I near the entrance to the Rapax Away Camp. That would actually be true of any RPCs you may have met to this point. The reason is that the party needs to make room for two specific RPCS who are relevant to a quest I am about to complete.
Ryu casts Set Portal at this point. Rothgar casts Return to Portal to return the party to He'Li's Inn in Arnika. I now release RFS-81 and Vi Domina, and their equipment is returned to my inventory.
Ryu casts Return to Portal so that the party is now ready to enter the Rapax Away Camp.

Rapax Away Camp
If you have only one of the Astral Dominae, Chaos, Moliri, or the Destinae Dominus, the Wilderness Clearing remains pretty much a wildlife area. If you enter the Clearing when you have 2 or 3 of those objects, the Rapax will have taken it over and set up their own war camp.
Now it is possible, assuming you haven't made enemies of the Rapax, to use subterfuge and try to sneak in for a conversation with 2 prisoners that they're holding. But this only goes so far. The moment you try to escape with them, they'll attack you.
So I may as well just get this over with now. I start combat, put up my protections against their spells, unleash offensive spells when I can get enough of them together, and start hacking away.
Ryu protects the left side, so he's often left with hurling his Boomerang Shuriken. But there are times where I want party members on the front or left like Terra and Rothgar to cast spells. So in those instances I rotate so that Ryu can cut down an enemy or two with his *Light Sword* and Zarax helps him out with his Dread Spear. Positioning and who can do what in a given round are everything in combat in this game.
Things take a bit of a downturn when Terra get rendered unconscious by a Noxious Fumes spell, and just before she could renew Elemental Shield. That meant several party members getting poisoned or knocked unconscious by Noxious Fumes spells during the last phases of the battles. But there are only a few Rapax Templars and Templar Knights left that I decide I can tough it until I take them out one by one.
I hide in a tent so that any further attention from the Rapax Archers in the towers soon ends.
I have nearly all the items I want now, so there isn't any particular incentive to disarm and loot chests anymore. But I do so for the sake of completeness, and it does net me some extra ammo at any rate.
Rapax Prince's Tent
Now I crash in on the Rapax Prince's tent, but he quickly departs. His concubines are easy to kill.
Training Reflextion
A couple of Templar Archers will attack me from a nearby tower once I leave the Prince's tent. It's actually the perfect opportunity to train some of my characters in the Reflextion skill they picked up.
The Archers' arrows can cause poisoning, but not critical hits so I don't need to worry about that. The idea is that the Archers will spread their missile fire randomly among six characters, giving each character a chance to recover from any hits taken. They'll also be attacking at penalties when their Stamina runs low. So long as the characters have good enough AC and items that regenerate their Hit Points, it should be safe to let them fire away during continuous combat.
Chun-Li is a vulnerable character, as she doesn't wear high end armor and has the least Hit Points. So she swaps out her Ring of Power and borrows the Ring of Regeneration.
Errol is another vulnerable character, as he also doesn't wear high end armor pieces although having the *Light Shield* helps. He borrows the Gown of Divinemail pieces from Rothgar, who borrows the Mirror Armor from Zarax, who in turn borrows the Golden Breastplate from Vi Domina. Zarax also borrows an Amulet of Healing from Rothgar, who has plenty of innate regeneration as a Lord.
I step outside to let combat begin. Everyone defends. Ryu, Zarax and Terra occupy the front row. Chun-Li and Errol occupy the back row, while Rothgar occupies the middle. I let combat run continuos while I went out cycling all day.
I came back, ate supper, put the combat back into phased, and then retreated back into the Prince's tent to end combat. Ryu reaches 95 Reflexion, Zarax reaches 84 and Terra reaches 50.
Zarax actually died during my second attempt when I left it to run overnight. Also, Terra isn't going as fast because having high Stealth means she's targeted less often. Those two things prompt me to make adjustments.
There's a Gown of Divinemail for the head in the chest at the back of the Prince's tent. So Errol wears it for the extra +1 Hit Point regeneration. He also takes an Amulet of Healing from Ryu.
Chun-Li uncurses herself and unequips her Staff of Doom, which was a bit of a drag on her Hit Point regeneration. Rothgar lends her his Amulet of Health.
She in turn uncurses Terra and lends her the Ring of Regeneration. Terra replaces her Fey Ring with it for the time being. This both avoids -1 Stamina drain and reduces Stealth for my current purposes.
Chun-Li uncurses Rothgar. He lends his Shield of Sacrifice to Zarax, which both gives him another +1 Hit Point regeneration and boosts his AC. Rothgar takes a Round Shield that was in the same chest.
Now I go back and let the Templar Archers fire away at me. But I now go with a 2-2-2 formation. Ryu and Zarax occupy the front row. Terra and Chun-Li are in the middle, and Terra exercises the protect option on Chun-Li. This hopefully gets her noticed more often, but also reduces any risks for Chun-Li. Rothgar and Errol are in the back, with Rothgar protecting Errol.
I let it run all day while I am at work. I come back, make and eat supper, and retreat into the tent to end combat. Ryu reaches 99 points, Zarax reaches 97 points, and Terra reaches 67 points.
I let it run overnight. Ryu reaches 100 points, Zarax reaches 98 points, and Terra reaches 75 points.
I let it run all day after I get up in the morning, and until I get back from Tuesday movie night. Zarax now also reaches 100 points, while Terra reaches 86 points.
I decide to ends things here, since I think it will take too long to get Terra to 100 in this way. I have a different idea for that. I go back to phase combat. Errol simply hits them with his Succubus Song, and has his Stamina recouped as needed, until they're worn down one by one.
Rapax King
Now I go west and enter the King's Tent. He's pretty easy, since he only has one other Templar to help him out. He leaves behind the King's Cave Key.
Rapax Queen
I leave the tent and go behind it. I use the King's Cave Key to unlock a gate to a cave. The Rapax Queen is apparently imprisoned here, and wants to be freed. She won't join you or anything like that, so it pretty much ends here, but she does have some interesting information to provide.
Rapax Stockade
Now I climb up the ladder of the nearest Archers' tower, where I killed the Templar Archers whom I practiced my Reflextion skills against. I then click on a rope that hangs outwards and seems to connect to another tower.
Now I continue northward. Close to the next archery tower is a gate that would have remained closed had I not pulled the rope. I kill the 2 Templar Knights that I run into. For the Archers, same strategy, Errol takes them down with repeated use of his Succubus Song.
I continue this process of pressing northwards and taking out any Templars, Templar Knights, and Archers that I run into. There will also be a Stockade Guard around, and he'll leave behind the Stockade Key once I kill him.
Drazic and Rodan
Note the spot on the map labelled 'Prisoners'. I then go up the ladder, and use the Stockade Key on the first locked door.
I then free both of Drazic T'Rang and Rodan Lewarx, who are needed to negotiate an alliance between the T'Rang and the Umpani, and recruit both of them into my party.
Umpani and T'Rang Alliance
Chun-Li casts Return to Portal, to return the party to the Old Mine Tunnels where I first found the Silver Nugget. I go west until I reach the entrance to Lower Marten's Bluff.
That brings me to the entrance marked "Old Mine Tunnels" on the east side of the map of Lower Marten's Bluff. Now I bring both Drazic and Rodan to Z'Ant T'Rang. Don't worry about anything on your part. Drazic and Rodan will do all the work to convince Z'Ant to join in an alliance with the Umpani.
I now get a Tracking Device, and everyone in the party gets 100,000xp. I take the 'Elevator' up to Marten's Bluff.
I go out the front gate of Marten's Bluff, and then around the west side.
I run into several Modais and Helligators. Ryu condemns the Modais to certain death with a Firestorm spell. Chun-Li hits the Helligators with a Psionic Blast, and two of them start attacking their fellows. I kill off the sane ones that charge me, and save the insane ones for last.
I know go down the trapdoor in the southwest corner.
That brings me to the stairs marked 'up' in the southwest corner of Lower Marten's Bluff.
I go east and a little south until I reach the T'Rang Teleporter. It's already set to bring the party to the North Wilderness, so I simply step through.

It brings me north of the bridge near the Umpani Camp. So I just need to go a little more north to enter the camp.

I arrive at the entrance marked 'Wilderness' on the south side of the Umpani Camp. I enter through the buiding just a little west of 'Panrack', and continue north until I reach an elevator marked 'Mount Gigas'. I just my Level 6 Security Pass to activate the elevator.

That brings me to the elevator marked 'To Umpani Camp' on the north side of the Mount Gigas Caves map. I travel south, east, south and then a little southwest until I reach the elevator marked 'To Upper Caves'. I use the Level 6 Security Pass to activate the elevator. I do have to fight three Ensaring Spiders along the way, but they're not so much of a danger now and so long as one warrior who's capable of highly damaging attacks is able to cut them down.

I am now at the elevator marked 'To Lower Caves' in the southwest corner of the Upper Caves. I travel northwest, and fight three more Ensnaring Spiders along the way.
Now I bring Drazic and Rodan to General Yamir. Again, they'll do the work to convince the General to get on board. The General now gives me a Top Level Security Pass that allows me access to the Peak of Mount Gigas, and the Umpani Gun. Everyone in the party also gets 100,000xp.
Destroying the Black Ship
Now I head over to the spot labelled 'Peak' on the map. I use the Top Level Security Pass at the door, and go up the tunnel to reach the Peak. I have to use the Pass again at another door. The next chicken-wire door can be opened simply by clicking on it.
The Umpani Gun will be obvious once you see it. I simply need to reach the control panel at it's left side. Now I take the Tracking Device from my inventory, and click it on the button of the control panel. The gun fires the missile and destroys the Black Ship of the Dark Savant. Everybody in the party gets 400,000xp.
I speak to General Yamir again so that Rodan and Drazic leave my party.
Ninja Masters Reflextion
Rothgar casts Return to Portal so that the party returns to the room in He'Li's in Arnika.

I bring RFS-81 back into the party. But I don't equip him with his Black Gowns of Death and Ring of Regeneration just yet. There's a specific reason why which I'll explain shortly.
I go downstairs and bring Vi Domina back into the party. I have her put on all her old equipment.
I go kill some Savant Androids at both the Savant Tower and the Spaceport. I quicksave at the south entrance of Arnika. Terra equips the Ring of Regeneration in place of her Fey Ring, and then I leave.

I go south and find exactly what I was hoping for, a pack of Juggernauts. I would have been willing to reload until I got what I wanted.
I want to dig myself into a nook, and there's one on the other side of them to the south. But that means they'll surround me at first. I kill a few of them, just enough to run through a gap and then lead them on. Chun-Li used a Firestorm spell to get rid of a few Rank Weeds that were accompanything them.
I nestle myself into the nook, although it's one where more than one Juggernaut can attack the front line. No matter.
I position Terra so that she's the sole character on the front line, Zarax goes to the left flank, and Ryu goes to the right flank. I let the two Juggernauts facing Terra attack her. Each can attack up to three times a round. They won't hit her often, and when they do the Ring of Regeneration will heal her up anyway. So it's safe enough for her during continuous combat. This is a faster way to maximize Reflextion for her.
But Stealth sometimes means they won't even see her and can't even attack her. If three rounds go by where they can't see her, they'll retreat until combat ends.
Once I noticed that, I adjust the default formation so that Zarax is on the left flank and Ryu is on the right flank, so the formation I want will be in place when the Juggernauts come back to attack me again.
But a new complication emerges. It eventually comes about that two will attack Terra, but a third manages to squeeze in and begin attacking Rothgar and Ryu on the right flank. Rothgar is safe enough with his regeneration as a Lord. But Ryu ended up dying during my first attempt at an overnight run.
So I reloaded an autosave and adjusted the formation so that Ryu is in the back, and Rothgar is by himself on the right flank.
That turns out to be beneficial because it means one Juggernaut will always attack Rothgar, and therefore none of them will retreat. That helps Terra's Reflexion training go by much faster.
I let it turn all day and check that she has now reached 100 points in Reflextion. That's when I kill the remaining Juggernauts and quicksave.
I will now return to the Mountain Wilderness.