-

- Forums
- Chatrooms
- Gallery
- Gameplay Videos
- Upload
- Articles
- Mod Reviews
- Shop SP: Games, Movies, Books
|
|
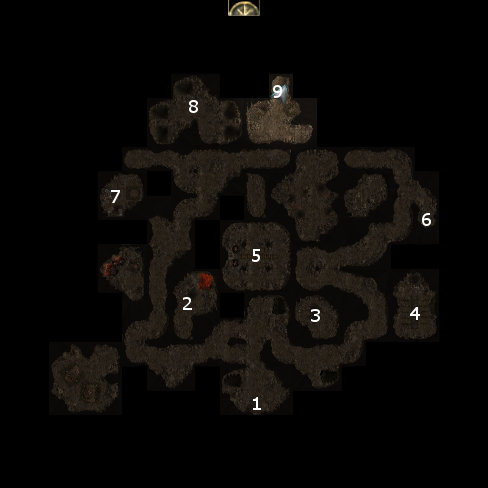
EYEGOUGER LAIR - LEVEL 1
Nimble Crossbow
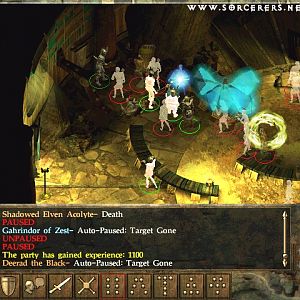
I enter the caves and start off at #1 on the Eyegouger Caves - Level 1 map. Straight ahead north will be several Orcs, but they use only Throwing Axes. I therefore sit back using the "follow me" command, and let Qara bombard them into oblivion with Fireballs. There will be a couple of stragglers to the left, so I have Casavir issue a "stand your ground" command and send him to take them out easily.
The central room at #5 has several Orcs who rely on missile fire. There is also a large trap in the middle of the room, and another trap at the north door. Here I show a simple trick. Qara casts a Greater Invisibility on Valeria. Valeria issues a "stand your ground" command and goes on ahead. She recovers the large trap in the middle.
After that, she positions herself behind one of the Orcs and issues an "attack nearest" command. She next promptly kills one of the Orcs outright with a sneak attack, while the rest of the party charges in to help out. One of the Orcs leaves behind the Nimble Crossbow (Heavy Crossbow +1, +2 Dexterity), which I'll just sell.
Valeria then recovers the trap near the north door. A nearby trapped chest has minor random treasure.
Torturer's Journal
Now I do a sweep of the western side of the level. The Orcs will be numerous. Qara makes generous use of her Fireballs whenever she can. Elanee will utilize Call Lightning Storm the party gets surrounded from all sides. Valeria keeps herself protected with Mirror Images to provide a distraction. Casavir often uses Divine Might to enhance his damage when faced with multiple foes.
At #7 will be several human guards. They leave behind +1 Studded Leather Armors and +1 magic weapons like a +1 Falchion or a +1 Scimitar. A chest in the cave provides a journal that describes torture and interrogation sessions, as well as a Mage's Battle Robes (Light, +2 Concentration, +2 Spellcraft, 10 spell resistance). This becomes Qara's robe for the time being. The chest could yield an Emerald or a Diamond but I think I have enough for my needs by now, so I instead extract 2 Topazes which will sell for more.
Wounded Orcs
Now I head over to the cave at #8. There are some wounded Orcs who are quite helpless. I decide to spare them in order to earn influence with both Casavir and Elanee.
*Evil* Wounded Orcs
Zarathos decides to slaughter the Orcs instead, losing -1 influence with both Casavir and Elanee.
Tagget's Talon
I fight many more Orcs in several waves. Sometimes the wave will appear behind me once I've reached a certain point. As always, Qara lets loose on clusters at a distance while Elanee cranks out her own Lightning spells whenever party members get surrounded. Valeria begins to show what she is capable of once she places a Blade Weave spell on her rapier. Her attacks frequently daze their targets, thereby preventing them from ever attacking.
At #6 will be another Ore deposit. Plenty more Orcs spawn around it.
An Orc Shaman at #5 will leave behind Tagget's Talon (Dagger +1, keen), which I'll sell. The Shaman also leaves behind a Wraith Dust that can be distilled into a Weak Air Essence and a Weak Power Essence, as well as a Hellhound Tooth that can be distilled into a Weak Fire Essence.
The chest east of #4 has two traps that I need to disarm, and I cherry pick it for 600+gp.
Wounded Wolves
I go back west a bit. At #3 is a cave with some wounded Wolves. I grab the opportunity to increase my influence with Elanee by choosing dialogue responses that involve not wanting to hurt them, and letting them go free.
*Evil* Wounded Wolves
Zarathos decides to slaughter the Wolves instead, and loses a lot of influence with Elanee as a result.
*NOTE* I return to Neverwinter after completing each level in order to sell off any excess loot I've found, although I don't show that in any videos. I would end up getting weighed down were I to try to bring back all the loot from all three levels of the Eyegouger lair, and I want to raise as much cash as I can for items that I'll want to purchase in Act 2. There are two in particular that are very expensive, the Headsman Falchion and the Asenath's Vengeance Spear.
The entrance to the next level is at #9.