-

- Forums
- Chatrooms
- Gallery
- Gameplay Videos
- Upload
- Articles
- Mod Reviews
- Shop SP: Games, Movies, Books
|
|
EYEGOUGER LAIR - LEVEL 3
Orc and Human Corpses
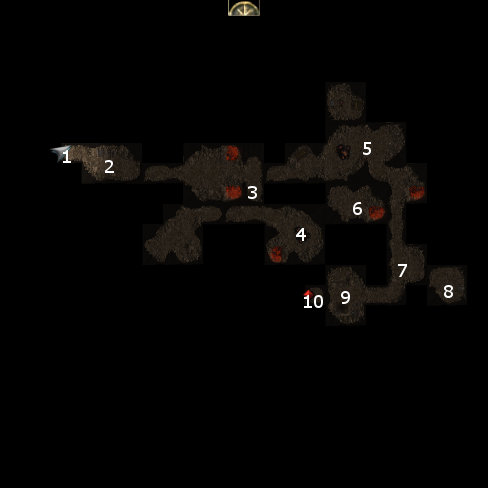
I start off at #1 on the third level map. At #2 is a cave where the dead bodies of human soldiers and Orcs alike lie side by side. Valeria grabs the opportunity to increase her influence with Casavir by showing respect for the dead and wanting to find out what happened. She can still grab the Shortsword +1 from the nearby weapon rack without any influence consequences.
*Evil* Orc and Human Corpses
The equivalent video for Zarathos. I initially had Elanee and Casavir and Neeshka during the previous two levels. I switched out Elanee for Qara for the third level. As for the dialogue itself, I deliberately lose influence with Casavir by suggesting that the party should loot the bodies of the dead. I then make a point of losing influence with Neeshka by insisting she fall in line or die when she gets creeped out by the scene. A nearby weapon rack has a Shortsword +1.
Bracers of Archery
I continue on east, and fight off a bunch of Ghasts, Ghouls and Zombies who are by now pretty easy to kill. Another ore deposit is at #3.
I then turn south, and fight more undead. Valeria uses a 'stand your ground' command to hold the line and prevent party members from tripping a trap that she wants to recover. Her and Casavir cut down any undead that come forward.
One of the undead leaves behind the Bracers of Archery (+1 Dexterity, Point Blank Shot), as well as a Ghast Claw that can be distilled into a Glowing Air Essence and a Weak Power Essence. Bishop already has a better Dexterity bonus and the Point Blank Shot feat. Grobnar has the Greater Gloves of the Minstrel. Nobody else does any archery, so I'll just sell it.
The cave due west has more undead and a chest with random loot.
Feywarden Crossbow
I continue east. The caves at #5 and #6 will have more undead, as well as containers with random loot. Valeria also recovers a Tangle Trap in the middle of the room at #5.
One of the Ghouls leaves behind a Ghoul Claw that can be distilled into a Weak Air Essence and a Faint Power Essence. One of the Skeletons leaves behind a Skeleton Rib that can be distilled into a Faint Earth Essence.
One of the containers yielded a Feywarden Crossbow. *Note* I lucked out here, as it was an extremely unlikely piece of random loot that I can now sell for plenty of gold.
Shadow Priest and Academy Students
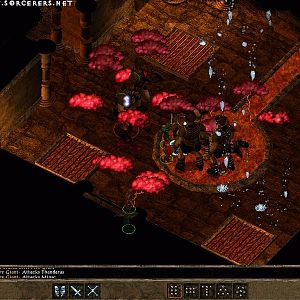
I then go south from #6. At #7 will be a former Academy student who was a friend of Qara's, and is apparently undergoing a transformation. A Shadow Priest and a couple more Academy students turned undead will show up. I deliberately choose the dialogue option of "I won't let you hurt her" in order to increase influence with Qara. The Priest and the Students can be dangerous with their spells if you don't bring them down quickly enough. Blade Barrier in particular can become quite a dangerous spell if you don't move out of it quickly enough. Qara starts things off right away with an Empowered Fireball, while Elanee throws in an Ice Storm for good measure. This suffices to kill the Academy Students outright and leaves the Shadow Priest badly wounded. Casavir then charges right after the Priest in order to bring him down as quickly as possible, while Qara aims a Flame Arrow spell. Winning then becomes a matter of course. The Priest leaves behind a Morningstar +2, and Dwarven Mirth (Light Shield +1, +2 Charisma). I suppose I could have Casavir use the shield, but that means a bit of a downgrade on his armor class (even if the minor boost to Charisma may be nice). So I'll just sell it.
*Evil* Shadow Priest and Academy Students
The equivalent video for Zararthos. The difference is that he selects the dialogue that involves letting the Shadow Priest have Qara, with the result that I lose -1 influence with her.
Issani of Waterdeep
At #8 is Issani of Waterdeep, the real Emissary. I deliberately start with the dialogue option that will increase influence with Casavir. Issani soon leaves on his own.
The containers at #9 will have a Journal that describes what the Shadow Priest had been up to, a Bastard Sword +1, and Gloves of the Hin Fist +2 (+2 attack, +1 sonic damage, Monks only). At #10 is the exit to the World Map.
*Evil* Zarathos starts off this dialogue by threatening to start the torture early, which loses -2 influence with Casavir.
Callum's Reward
I return to Old Owl Well, and Commander Callum rewards me with 1,000gp and Re's Redemption (Greataxe +2, +4 vs. Orcs, +1d6 damage vs. evil). I suppose I could have Bishop use the Greataxe, but it seems a bit out of character roleplaying wise to have an evil character like Bishop use it. Bishop will be getting a pretty good Falchion during Act II anyway. I'll wait until I can sell Re's Redemption to a merchant who will pay more than 10,000gp for it.
I also get 500xp for bringing Callum the Orcish Medallion. The video concludes with me speaking briefly with Katriona as well, getting a little more influence with Casavir along the way.
Valeria's next quest involves a ship called the Sea Ghost.
*Evil* Callum's Reward
Zarathos for his part conducts the dialogue, pressing constantly for a selfish reward from Callum. He also makes a point of losing influence twice with Casavir by selecting dialogue options that suggest leaving Casavir to his own fate.
Zarathos' next quest would be to kill an informant for the Watch named Fihelis.